Tutorial using create-react-app
Setup application
Use create-react-app to bootstrap your React application:
Add the dependency:
Edit the file src/App.js and add the imports:
At the top, add the initialization of the ux4iot instance:
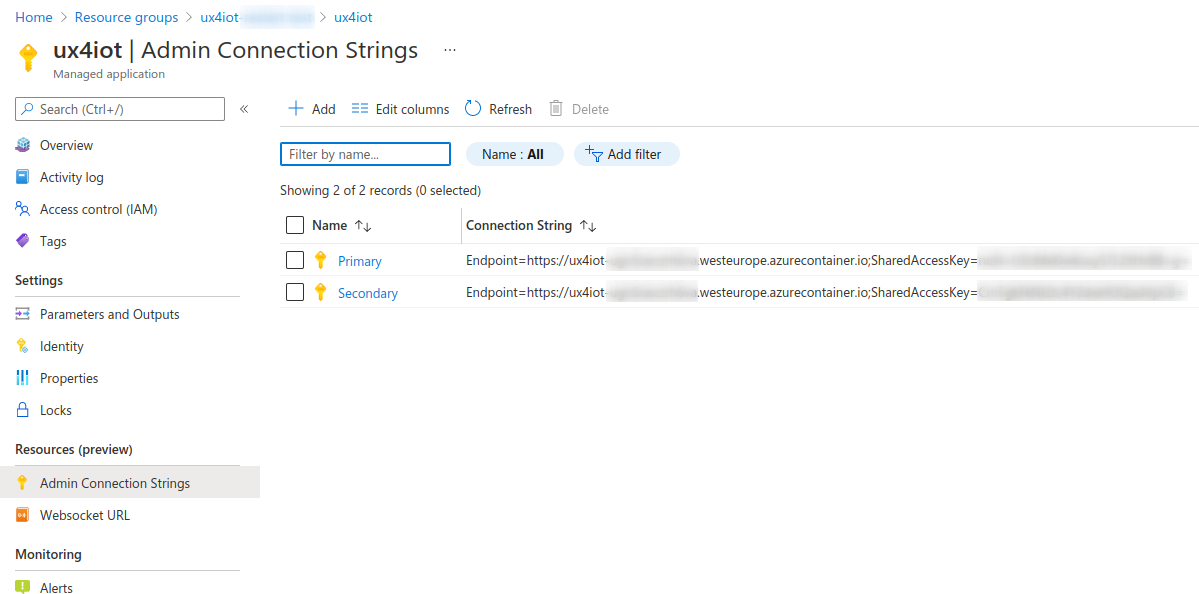
You can retrieve the connection string from the Azure Portal:
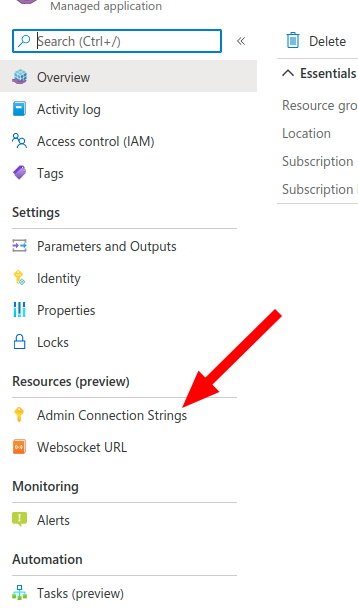
Info
Use .env and .env.local files to store your app's environment variables. Read more about that in create-react-app's section on environment variables
Replace the existing App component with this:
function App() {
  return (
    <div className="App">
      <Ux4iotContextProvider
          options={{ adminConnectionString: UX4IOT_ADMIN_CONNECTION_STRING }}
      >
          <MyView />
      </Ux4iotContextProvider>

  );
}
By creating the Context here, all sub-components (like MyView) can use the ux4iot hooks. Now, add the MyView component:
const MyView = props => {
    const temperature = useTelemetry('simulated-device', 'temperature');
    return <div>{temperature};
}
Your App.js should now look like this:
import './App.css';
import {Ux4iotContextProvider, useTelemetry} from "ux4iot-react";

const UX4IOT_ADMIN_CONNECTION_STRING = 'YOUR_ADMIN_CONNECTION_STRING';

const MyView = props => {
    const temperature = useTelemetry('simulated-device', 'temperature');
    return <div>{temperature};
}

function App() {
  return (
    <div className="App">
      <Ux4iotContextProvider
          options={{ adminConnectionString: UX4IOT_ADMIN_CONNECTION_STRING }}
      >
          <MyView />
      </Ux4iotContextProvider>

  );
}

export default App;
As usual with create-react-app you can start the application with:
Info
If you use your admin connection string in the frontend, there will be a notification in your browsers console that you're using ux4iot-react in development mode. In order to use ux4iot-react in production mode, you will need to provide your own security backend as explained in the next section.
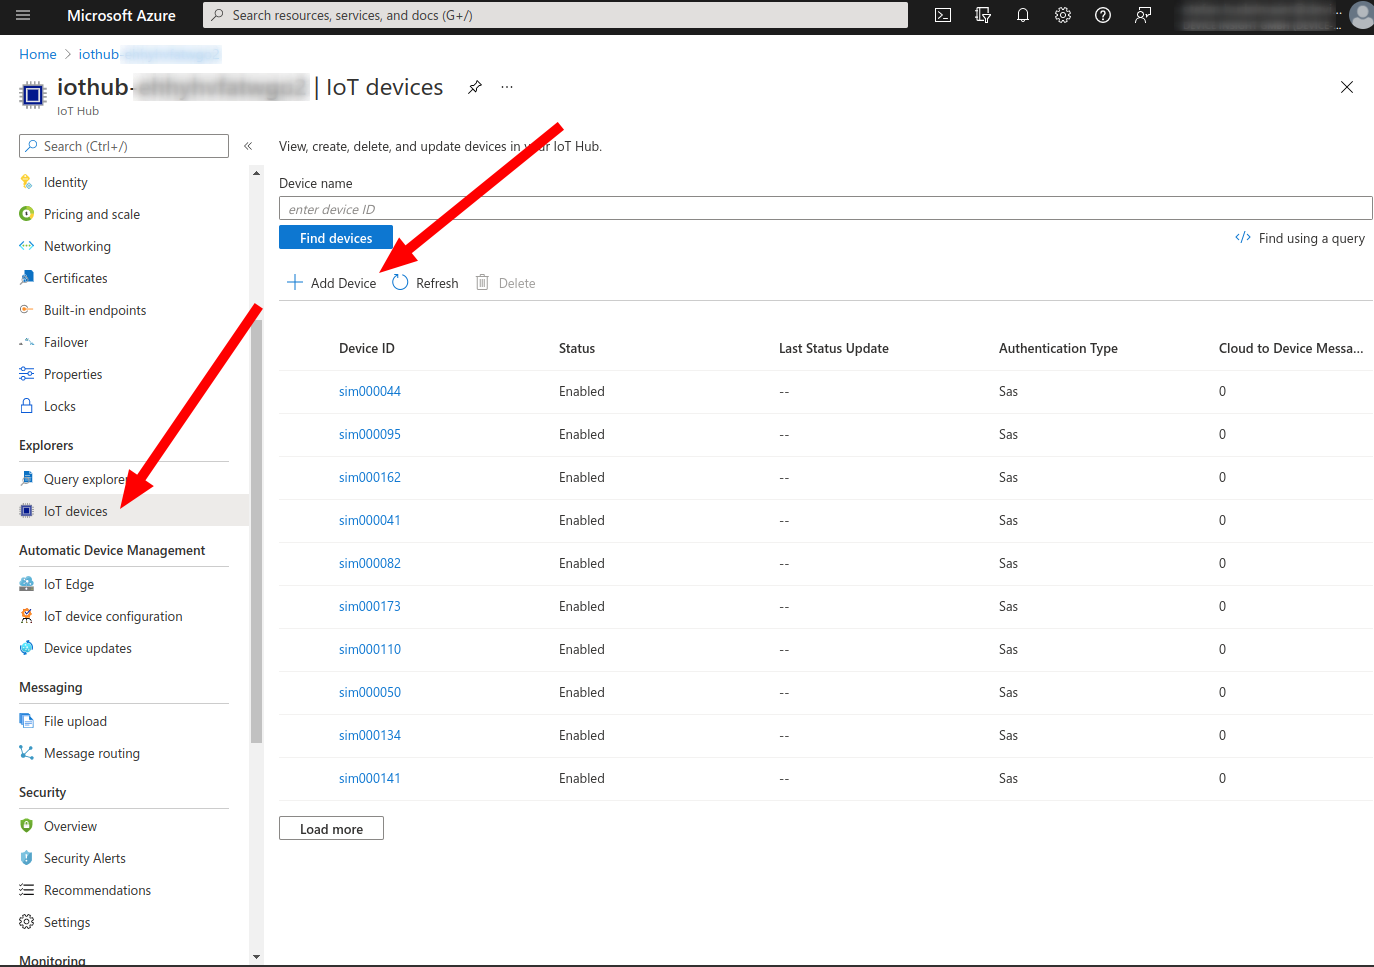
Send simulated data
If you do not already have an IoT devices sending data, you can easily simulate one. First, create a device with device ID simulated-device in the IoT Hub:
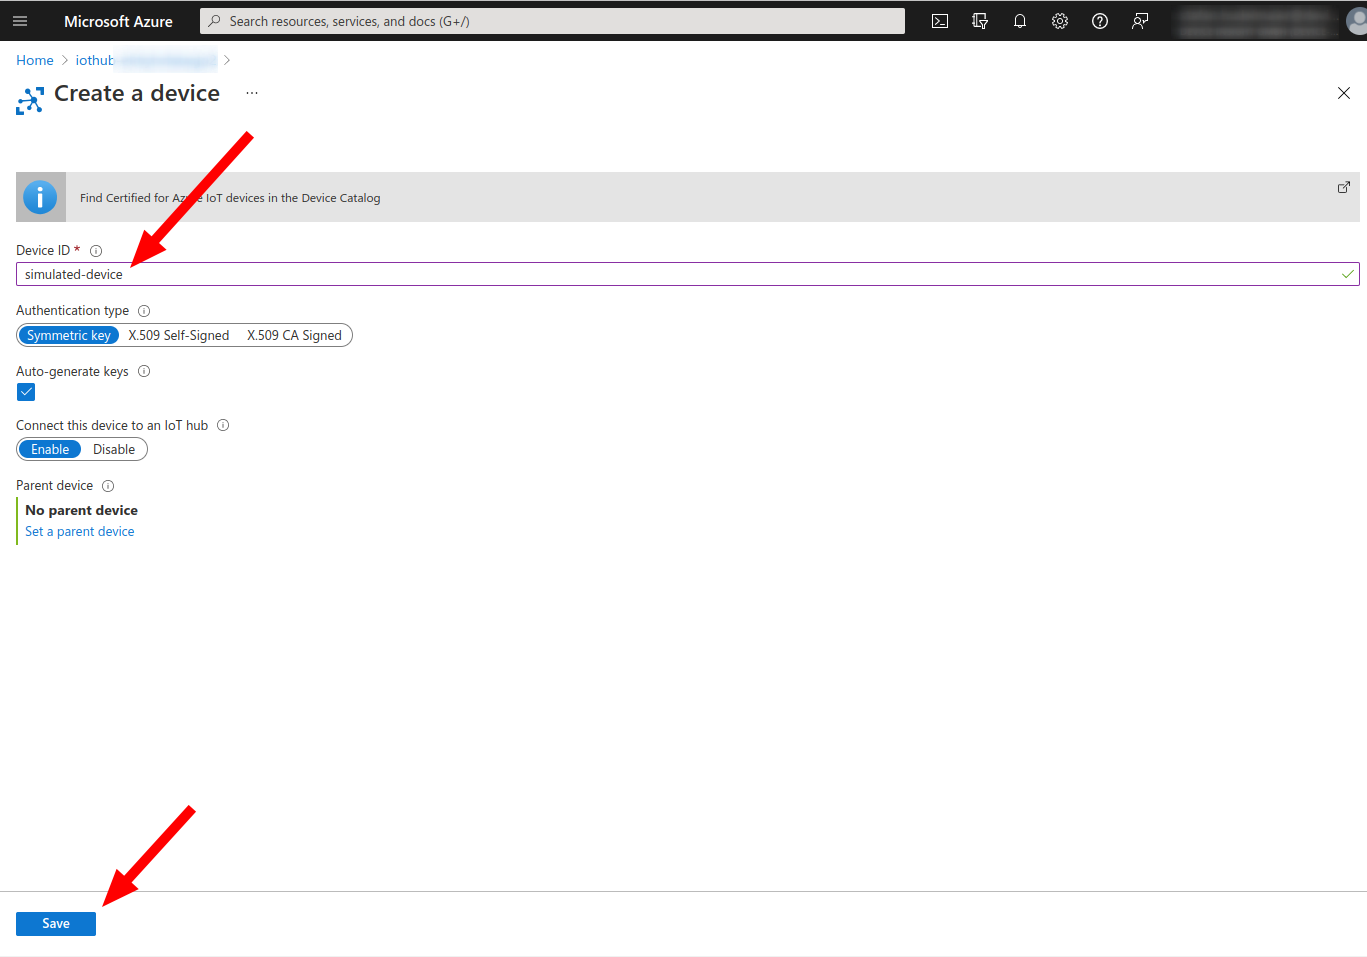
Now copy the connection string for the device.

With the connection string you can start a simulator using Docker by invoking the following command. (The GitHub repo of the simulator can be found here.)
docker run --rm -ti \
  -e DEVICE_CONNECTION_STRING="HostName=xxx.azure-devices.net;DeviceId=simulated-device;SharedAccessKey=xxx" \
  ghcr.io/stefan-hudelmaier/simulated-temperature-sensor:main
This will publish a random value of the temperature telemetry. The messages look like this:
You should now see the value reflected in your React application.